
Deacons are ordained servants in the church, rooted in biblical tradition, assisting elders, and ensuring church unity through humble, sacrificial service and meeting members’ tangible needs․
1․1․ Definition and Biblical Basis
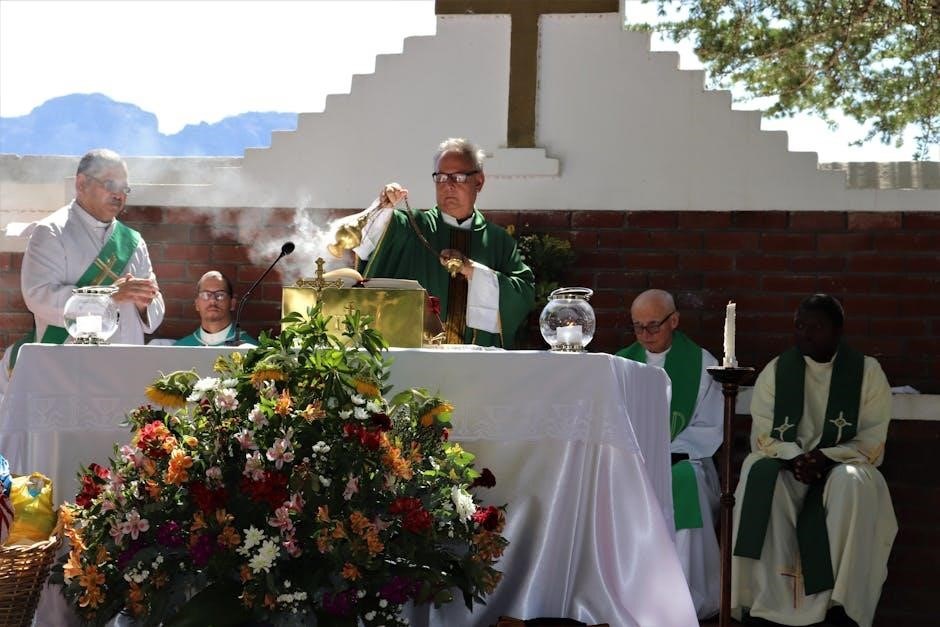
Deacons are ordained servants in the church, rooted in biblical tradition, with roles defined in Acts 6:1-7 and 1 Timothy 3:8-13․ They serve as models of humility, dignity, and sacrificial service, ensuring church unity and addressing tangible needs․ The Greek terms diakonos (servant) and diakonia (service) underscore their ministry․ Biblically, deacons are called to support elders, foster harmony, and care for the congregation, embodying Christ’s example of selfless service․ Their role is distinct yet vital, grounded in Scripture and church tradition, emphasizing spiritual maturity and a servant-hearted lifestyle․
1․2․ Historical Development of the Diaconate
1․3․ The Importance of Deacons in Church Governance
Deacons play a crucial role in church governance by assisting elders and pastors, ensuring the spiritual well-being of the congregation․ They address tangible needs, protect church unity, and handle administrative tasks, allowing elders to focus on teaching and prayer․ Their service prevents pastoral burnout and ensures balanced leadership․ By caring for practical matters, deacons enable the church to function effectively, fostering a harmonious environment for spiritual growth․ Their role is essential for maintaining order and promoting the church’s mission, as outlined in Acts 6:1-7 and 1 Timothy 3:8-13․
Deacons are vital in church governance, ensuring the well-being of the congregation by addressing practical needs and maintaining unity․ They free elders to focus on spiritual matters, preventing burnout and enabling balanced leadership․ Their administrative and organizational roles are crucial for effective church operations, fostering harmony and spiritual growth․ By caring for tangible needs, deacons allow the church to function smoothly, fulfilling its mission as outlined in Acts 6:1-7 and 1 Timothy 3:8-13․

Biblical and Historical Basis for the Diaconate
The diaconate is rooted in Acts 6:1-7 and 1 Timothy 3:8-13, establishing deacons as servants in the early church, ensuring unity and meeting practical needs historically․
2․1․ The Origin of Deacons in the New Testament
The diaconate traces its origins to Acts 6:1-7, where the apostles appointed seven servants to address the needs of the growing church․ This establishes deacons as ministers tasked with caring for the congregation, ensuring unity, and freeing elders to focus on prayer and teaching․ The Greek terms diakonos (servant) and diakonia (service) emphasize their role in humble, sacrificial ministry, reflecting Christ’s example of serving others․ This New Testament foundation underscores the diaconate’s essential function in the early church and its enduring relevance today․
2․2․ Key Biblical Texts on Deacons (1 Timothy 3:8-13, Acts 6:1-7)
Key biblical texts for deacons include Acts 6:1-7, where the apostles appoint seven servants to care for the church, and 1 Timothy 3:8-13, detailing their qualifications․ These passages emphasize deacons’ roles in serving the church, maintaining unity, and being faithful stewards․ The texts highlight the importance of dignity, integrity, and a blameless life for those serving in this capacity, ensuring they are worthy of respect and capable of humble, sacrificial service within the congregation․
2․3․ The Role of Deacons in Early Christianity
In early Christianity, deacons played a vital role in caring for the practical needs of the church, ensuring unity, and fostering a sense of community․ They served as servants to the congregation, addressing tangible needs such as feeding the poor and widows, as seen in Acts 6:1-7․ Their role was not only administrative but also spiritual, as they supported the apostles and elders in ministry․ This early model emphasized humility, sacrificial service, and a commitment to the well-being of all church members, setting a foundation for the diaconate that continues to inspire modern ministries․

Qualifications and Characteristics of Deacons
Deacons must be men of dignity, serious-minded, and humble, with a commitment to sacrificial service․ They are ordained servants, prioritizing others’ needs over personal gain or prestige․
3․1․ Biblical Qualifications for Deacons (1 Timothy 3:8-13)
According to 1 Timothy 3:8-13, deacons must be men of dignity, integrity, and faith․ They should not be double-tongued or lovers of money, demonstrating a sincere commitment to their faith and family․ The role requires humility, sacrificial service, and a reputation for integrity․ These qualifications ensure deacons are trustworthy servants, capable of serving the church effectively while maintaining a godly character․ The biblical standard emphasizes spiritual maturity and a heart for service, aligning with the New Testament’s vision of diakonia, or servant ministry․
3․2․ Personal Characteristics: Dignity, Humility, and Sacrificial Service
Deacons must embody dignity, humility, and sacrificial service, reflecting their role as servants of the church․ Dignity ensures they are respected and serious-minded, while humility keeps them grounded in their service․ Sacrificial service involves putting others’ needs before their own, demonstrating a commitment to the well-being of the congregation․ These traits, rooted in biblical teachings, foster trust and unity within the church community, enabling deacons to serve effectively and compassionately․
3․3․ The Importance of Spiritual Maturity
Spiritual maturity is essential for deacons, as it equips them to lead and serve effectively․ Mature deacons demonstrate a deep understanding of Scripture, prayerful discernment, and Christ-like character․ Their spiritual depth enables them to guide others, resolve conflicts, and maintain integrity in their ministry․ Spiritual maturity also fosters humility and a servant-hearted attitude, aligning their actions with biblical standards․ It ensures deacons can navigate challenges wisely and model a life transformed by faith, making their ministry impactful and genuine․

Responsibilities and Duties of Deacons
Deacons assist elders, meet tangible needs, protect unity, and handle administrative tasks, ensuring the church functions effectively while fostering a compassionate and harmonious community․
4․1; Assisting Elders and Pastors in Church Ministry
Deacons support elders and pastors by addressing tangible needs, ensuring church unity, and handling administrative tasks․ They serve as humble, sacrificial servants, focusing on dignity and seriousness․ While their role varies across churches, deacons are ordained to assist spiritual leaders, freeing them to focus on preaching and teaching․ Their work ensures the smooth operation of church ministries, allowing pastors to concentrate on spiritual guidance․ Effective deacons balance practical service with spiritual maturity, maintaining respect and integrity in their supportive role․
4․2․ Meeting Tangible Needs in the Congregation
Deacons are tasked with identifying and addressing the practical needs of church members, ensuring no one is overlooked․ This includes assisting with daily challenges, providing support during crises, and organizing community outreach․ By meeting tangible needs, deacons demonstrate Christ-like compassion and foster a sense of belonging․ Their role ensures the church remains a place of care and unity, where members’ physical and emotional well-being are prioritized․ This practical service is a cornerstone of their ministry, reflecting their calling as humble servants of the congregation․
4․3․ Protecting Church Unity
Deacons play a vital role in safeguarding church unity by mediating conflicts and fostering harmony among members․ They address disagreements compassionately, ensuring divisiveness does not hinder the church’s mission․ By promoting understanding and mutual respect, deacons help maintain a unified body of believers․ Their efforts create an environment where members feel valued, leading to a stronger, more cohesive congregation․ Protecting unity is a cornerstone of their ministry, reflecting their commitment to Christ-like servanthood and the well-being of the church family․
4․4․ Administrative and Organizational Roles
Deacons often undertake administrative and organizational duties to support the church’s operations․ They may manage resources, coordinate events, and oversee ministries, ensuring efficiency and effectiveness․ By handling logistical tasks, they free pastors and elders to focus on spiritual leadership․ Deacons also maintain order in church affairs, ensuring decisions align with biblical principles․ Their organizational skills help sustain the church’s mission, fostering a structured environment for worship and service․ Effective administration is a key aspect of their role, enabling the church to function smoothly and achieve its goals․
The Relationship Between Deacons and Elders
Deacons and elders collaborate in church leadership, with deacons supporting elders by addressing practical needs and fostering unity, while elders focus on spiritual guidance and oversight․
5․1․ distinctions in Roles and Responsibilities
5․1․ Distinctions in Roles and Responsibilities
Deacons and elders have distinct roles within the church․ Elders focus on spiritual leadership, preaching, and doctrine, while deacons concentrate on practical service and meeting tangible needs․ Deacons assist elders by addressing congregational concerns, ensuring unity, and managing administrative tasks․ This division allows elders to focus on prayer and ministry, freeing them from oversight of logistical matters․ Both roles are essential but differ in scope, with deacons emphasizing service and elders prioritizing spiritual guidance․ This distinction ensures a balanced and effective church governance structure․
5․2․ Collaborative Ministry: Working Together for Church Unity
Deacons and elders collaborate to maintain church unity by sharing responsibilities․ Deacons handle practical needs, allowing elders to focus on spiritual matters․ Together, they foster harmony, mediate conflicts, and address congregational concerns․ Their partnership ensures balanced leadership, with deacons serving as bridges between the congregation and elders․ Open communication and mutual respect are key to their effective teamwork, ensuring the church remains united and focused on its mission․
5․3․ Mutual Respect and Accountability
Deacons and elders maintain mutual respect through shared commitment to church unity and biblical principles․ Deacons are held to high standards of dignity and humility, fostering accountability․ Both roles prioritize sacrificial service, ensuring harmony and trust․ Open communication and respect for each other’s responsibilities strengthen their partnership․ Accountability is upheld through ordained status and a focus on unity, enabling them to address challenges respectfully and collectively․ This mutual respect ensures effective collaboration, honoring their shared mission to serve the church faithfully․

Training and Development for Deacons
Deacons receive biblical and theological training, practical skills, and mentorship to effectively serve, ensuring they are equipped for ministry and leadership within the church․
6․1․ Biblical and Theological Training
Biblical and theological training is essential for deacons to understand their role and responsibilities; This training involves studying Scripture, church doctrines, and the historical context of the diaconate․ Deacons must grasp key biblical texts, such as 1 Timothy 3:8-13, to ensure they meet spiritual qualifications․ Theological education helps deacons articulate the gospel clearly and apply it in ministry․ Practical application of these teachings ensures they serve with integrity, dignity, and humility, aligning their work with the church’s mission and values․ This foundation prepares them to address spiritual and practical needs effectively․
6․2․ Practical Skills for Effective Ministry
Deacons need practical skills to effectively serve their congregation․ This includes strong communication and compassion to address members’ needs․ They should be adept at organizing resources, managing budgets, and leading community initiatives․ Conflict resolution and cultural sensitivity are crucial for fostering unity․ Deacons must also possess leadership abilities to guide ministry teams and collaborate with elders․ Practical skills ensure they can efficiently meet tangible needs, such as visiting the sick or organizing food drives, while maintaining dignity and humility in their service․ These skills empower deacons to serve effectively and compassionately․
6․3․ Mentorship and Leadership Development
Mentorship is vital for deacons to grow in their roles, fostering spiritual maturity and practical wisdom․ Experienced deacons guide new members, helping them understand their responsibilities and develop leadership skills․ Leadership development equips deacons to manage ministries effectively, communicate clearly, and resolve conflicts․ Through mentorship, deacons learn to balance their roles with humility and dignity, ensuring they serve as Christ-like servants․ This process strengthens their ability to lead compassionately and wisely, benefiting both the congregation and the church’s overall mission․

Challenges Facing Modern Deacons
Modern deacons face balancing ministry with personal life, addressing diverse congregational needs, and navigating church conflicts while maintaining unity and spiritual integrity in their roles․
7․1․ Balancing Ministry and Personal Life
Deacons often face the challenge of balancing their ministry responsibilities with personal and family life․ Effective time management and setting boundaries are crucial to avoid burnout․ Prioritizing spiritual well-being and seeking support from family and church members can help maintain harmony․ Deacons must ensure their personal life does not suffer while serving, as their ministry depends on their own spiritual health and stability․ Balancing these areas requires intentional effort, prayer, and a commitment to self-care to sustain their role in the church effectively․
7․2․ Addressing Diverse Needs in the Congregation
Deacons face the challenge of addressing the diverse needs of congregation members, including spiritual, emotional, and physical support․ This requires empathy, active listening, and a willingness to serve․ They must identify and respond to various concerns, ensuring all members feel valued and cared for․ By providing practical assistance, such as food, counseling, or financial aid, deacons help meet tangible needs․ Collaboration with church ministries and community resources is essential to address complex issues effectively and foster a sense of unity and compassion within the church․
7․3․ Navigating Church Politics and Conflicts
Deacons often face challenges in navigating church politics and conflicts, requiring wisdom and discernment․ They must balance diverse opinions and interests while maintaining unity․ Effective communication and active listening are crucial in mediating disputes and fostering harmony․ Deacons should avoid seeking power or prestige, instead focusing on their role as humble servants․ By adhering to biblical principles and prioritizing the well-being of the congregation, deacons can help resolve conflicts and promote a positive, Christ-centered environment within the church․

Successful Deacon Ministries: Case Studies
Examining real-life examples of effective deacon ministries provides insights into successful strategies, highlighting their impact on church communities and the lessons learned from these positive role models․
8․1․ Examples of Effective Deacon-Led Ministries
Effective deacon-led ministries often include food banks, community outreach, and benevolence programs․ These initiatives demonstrate compassion and unity, addressing tangible needs while fostering spiritual growth․ Deacons also excel in mentoring new believers, providing guidance and encouragement․ Successful ministries often emphasize humility, sacrificial service, and a focus on others, reflecting the biblical mandate․ Such examples highlight the diaconate’s role in enhancing church unity and meeting diverse congregational needs through practical, Christ-centered service․
8․2․ Lessons Learned from Successful Deacon Teams
Successful deacon teams emphasize collaboration, clear communication, and a shared vision․ They prioritize spiritual maturity and humility, ensuring their ministries align with the church’s mission․ Effective teams foster unity by addressing diverse needs and mediating conflicts․ Continuous learning and adaptability are key, as they navigate changing congregational demands․ These teams also stress the importance of balancing ministry with personal life, ensuring sustainability․ Their examples demonstrate that humility, sacrificial service, and a focus on others are essential for impactful ministry, fostering a sense of community and harmony within the church․
8․3․ Overcoming Challenges in Deacon Ministries
Deacons often face challenges like balancing personal life and ministry, addressing diverse congregational needs, and navigating church conflicts․ To overcome these, effective deacons prioritize prayer, seeking guidance from elders, and fostering open communication․ Mentorship and collaborative problem-solving are vital․ By remaining humble and focused on sacrificial service, deacons can adapt to changing demands while maintaining unity․ Continuous learning and a commitment to dignity and respect help them navigate complexities, ensuring their ministries remain impactful and aligned with the church’s mission, ultimately strengthening the community they serve․

The Role of Deacons in Church Unity
Deacons protect church unity by addressing needs, resolving conflicts, and promoting harmony, fostering a sense of community through humble, sacrificial service․
9․1․ Promoting Harmony Among Church Members
Deacons play a vital role in fostering harmony by mediating conflicts and encouraging open communication․ They address tangible needs, preventing divisions, and promote unity through humble, sacrificial service․ Their ministry ensures that all members feel valued, fostering a sense of community and shared purpose․ By acting as servants and peacemakers, deacons help maintain a harmonious environment, allowing the church to focus on its spiritual mission․ Their efforts strengthen relationships and uphold the church’s unity, reflecting the biblical ideal of a cohesive body of believers․
9․2․ Mediating Conflicts and Disputes
Deacons are instrumental in mediating conflicts within the church, ensuring disputes are resolved biblically and fairly․ They act as peacemakers, fostering understanding and reconciliation among members․ By addressing issues with patience and humility, deacons help maintain harmony and protect the church’s unity․ Their role involves counseling, active listening, and guiding members toward resolution․ Through their efforts, deacons prevent divisions and promote a culture of love and mutual respect, ensuring the church remains a unified body of believers focused on its spiritual mission․
9․3․ Fostering a Sense of Community
Deacons play a vital role in fostering a sense of community by promoting unity and togetherness among church members․ They organize events, activities, and ministries that encourage connection and shared purpose․ By addressing the tangible needs of the congregation, deacons create an inclusive environment where everyone feels valued․ Their servant-leadership model inspires members to engage in acts of love and service, strengthening bonds within the church․ This collective effort cultivates a vibrant, supportive community where believers grow together in faith and fellowship․
Ordination and Recognition of Deacons
Ordination signifies the recognition of deacons’ calling, marking their official role in serving the church․ Their contributions are celebrated, honoring their commitment to humble, sacrificial service within the congregation․
10․1․ The Process of Ordination
The ordination of deacons involves a formal process, often including nomination, theological training, and a council review․ Candidates must demonstrate biblical qualifications and a call to servant leadership․ The process typically concludes with a public ordination ceremony, where they are officially recognized and prayed over by church leaders․ This step signifies their commitment to serving the church and upholding the diaconate’s biblical standards, ensuring they are equipped for their ministry role․
10․2․ The Significance of Ordination in Church Life
Ordination holds profound significance in church life, marking a deacon’s official recognition as a servant leader․ It symbolizes their dedication to Christ and the church, affirming their role in maintaining unity and meeting members’ needs․ The ceremony serves as a public declaration of their commitment, fostering accountability and trust within the congregation․ Through ordination, deacons are empowered to fulfill their biblical mandate, ensuring the church’s effective functioning and spiritual growth․ This sacred act strengthens the church’s structure and reinforces the importance of the diaconate in God’s plan․
10․3․ Celebrating Deacons’ Contributions
Celebrating deacons’ contributions is vital for recognizing their dedication and service․ Regularly acknowledging their efforts fosters appreciation within the church, encouraging continued faithful ministry․ Public recognition during special services or events highlights their impact, boosting morale and unity․ Additionally, sharing testimonies of their work inspires others to emulate their example․ By honoring deacons, the church reaffirms the value of their role, ensuring their contributions remain visible and cherished in the community of believers, reflecting their humble yet vital service․
The Future of the Diaconate
The diaconate’s future lies in adapting to cultural shifts, leveraging technology, and engaging diverse communities while maintaining its core mission of humble, sacrificial service rooted in biblical principles․
11․1․ Emerging Trends in Deacon Ministry
Modern deacons are embracing new challenges, adapting to cultural shifts, and leveraging technology for ministry․ There is a growing emphasis on community engagement, social justice, and holistic care․ Deacons are increasingly focusing on equipping congregants for service and fostering cross-cultural missions․ With rising diversity, deacons must navigate complex needs while maintaining their biblical mandate․ Training programs now often include modules on cultural sensitivity and digital outreach․ These trends reflect the evolving role of deacons in addressing contemporary issues while staying rooted in their biblical and historical foundation․
11․2․ Adapting to Changing Church and Cultural Needs
Deacons must adapt to evolving church and cultural dynamics, addressing diverse needs with sensitivity․ As churches grow more inclusive, deacons are increasingly involved in cross-cultural ministries and social justice․ They navigate generational differences, integrating traditional values with modern approaches․ Technology is now a key tool for outreach, enabling deacons to connect with congregants in innovative ways․ By embracing these changes, deacons ensure their ministry remains relevant and impactful, fostering unity and care in a rapidly changing world while staying true to their biblical mandate․
11․3․ Ensuring the Relevance of the Diaconate
Deacons must stay attuned to the congregation’s needs, remaining proactive in addressing spiritual and practical challenges․ By fostering innovation in ministry while honoring tradition, they maintain relevance․ Their role, though varied across churches, requires flexibility to adapt to cultural shifts․ Deacons must actively seek ways to engage diverse demographics and embrace new methods of service, ensuring the diaconate remains vital and impactful in contemporary church life․ This adaptability ensures their ministry continues to meet the evolving needs of the community they serve․
Deacons are essential servants, rooted in biblical tradition, crucial for fostering unity and meeting members’ needs․ Their humble service exemplifies Christ’s ministry, inspiring others to follow․
12․1․ Summary of Key Points
Deacons are ordained servants in the church, rooted in biblical tradition, serving with humility and dignity․ They assist elders, meet tangible needs, and protect church unity․ Their role requires spiritual maturity, sacrificial service, and strong personal character․ Deacons must balance ministry with personal life, address diverse congregation needs, and navigate church challenges․ Successful deacon ministries emphasize harmony, conflict resolution, and community fostering․ Ordination signifies their sacred calling, and their contributions are vital for church health․ The diaconate remains relevant, adapting to modern needs while maintaining its biblical foundation․
12․2․ Encouragement for Aspiring Deacons
If you are considering the role of a deacon, remember that it is a sacred calling requiring humility, dignity, and a servant’s heart․ Aspiring deacons should prayerfully reflect on their spiritual maturity and willingness to serve sacrificially․ The role offers profound opportunities to impact lives, foster unity, and glorify God․ Embrace the challenge with faith, knowing that your efforts will bring tangible blessings to your church and community․ Remember, being a deacon is not about power but about serving others in love and humility․
12․3․ Final Thoughts on the Importance of Deacons
Deacons are vital to church life, serving as humble servants who embody Christ’s love through their actions․ Their role in meeting practical needs, protecting unity, and supporting leadership is indispensable․ By living out biblical qualifications and fostering a sense of community, deacons ensure the church remains a place of harmony and compassion․ Their ministry exemplifies the heart of servant leadership, enriching both the church and the lives they touch․ The diaconate is a cornerstone of effective church governance and a testament to God’s grace in action․